Monday, July 9, 2012

Cake Ball - Status: Failed

Hello all! I've been away for longer than I thought... but I have come back to entertain y'all with a failed Pin! I wanted to make cake balls for one of my best friend's bridal shower... I was thinking, "I can make all these precious cake balls in her wedding colors and top them all off with a pretty T and everyone will love them and I can quit teaching and open a cake shop and get a reality show..."

Basically I was getting pretty excited about all my future plans in the baking business. 

Here we go: 

What I used:
* 4 cups of cake (mine was just the plain ole white cake for practice)
* 1/2 cup of butter cream 
* white chocolate candy coating (I bought at Kroger)

The pan with the wax paper and the cooling rack will come in handy later. 


Here I am cutting the cake up into tiny pieces... you aren't suppose to have ANY big pieces of cake so once I put it in the bowl I really broke it apart with my hands.

After I put in the half cup of butter cream... it looked sticky and I did not enjoy mixing it with my hands. It got stuck all over my hands and wouldn't come off... my dreams of being buddies with Buddy from Cake Boss were slowly going downhill...

Roll the mix into 1 inch balls. I placed mine on a waxed cookie sheet... LESS CLEAN UP! 

After you finish rolling, place your cake balls into the freezer. The recipe I used said to just keep them in the freezer until you are done melting the chocolate... first mistake. Leave them in there for a while. They are easier to work with when they are hard. 

After they have been in the freezer for a while, place your cake balls on a cooling rack over a cookie sheet (again lined with wax paper... less mess people!)

I would like to point out that the chocolate is NOT moving in this picture. She had scraped it all forward hoping it would pull together and pour out neatly on top of the perfectly round cake balls.  It didn't... it just sat there in all it's lumpy wonder. 

I dyed my white chocolate with regular food coloring. I reheated it and it still wouldn't pour.
Turns out you're suppose to add shortening (Crisco) to help thin out the consistency.. or you can use a small amount of Crisco vegetable oil. Of course, I didn't know that until I was writing this!
Mom tried really hard to make this work and tried rolling the cake balls in the chocolate using two forks, but the chocolate just started to harden again, again, because of the lack of the vegetable oil. 

These cake balls could be used as alien babies in the next sci-fy film!


 I am going to re-attempt making these tomorrow and this is what I'm going to do differently:

1. Don't use the candy coating you buy at Kroger. After researching, I found that most people use the Wilton chips that you can buy at Michael's.
2. Add a bit of Crisco Vegetable Oil to the Wilton chips to help get it more workability.

So, my future cake shop isn't exactly on the horizon but I'm still going to get it another shot! Also, I might try putting them on sticks, that seems to help with the pouring of the chocolate as well. We will see!

Tuesday, June 12, 2012

Peanut Butter Reese's Pudding Chocolate Chip Cookies

These cookies are a mouthful to say and a mouthful of goodie goodness!


Here is what you'll need: 
* 3/4 cup butter (softened)
* 1/2 cup peanut butter
* 1/2 cup sugar
* 1/2 cup brown sugar 
* 2 eggs
* 1 TBSP honey
* 1 TSP vanilla
* 2 1/4 cup flour 
* 1 TSP baking soda
* 1/2 TSP salt
* 1 small box instant vanilla pudding 
* 1 cup chocolate chips
* 1 cup Reese's Pieces
* 1 cup dried banana chips (broken)

In a bowl combine the flour, baking soda, salt, and pudding mix and set aside for later. 
In a large mixing bowl (I used my Kitchen Aide Mixer) combine butter, peanut butter, sugar and brown sugar until fluffy. Add the eggs, vanilla, and honey and beat again until completely mixed. 
Slowly add the dry ingredients, a little at a time. Not all at once. 
Stir in the chocolate chips, Reese's, and banana chips by hand with a spoon.

Drop by spoon onto a baking sheet, leaving about 2 inches in between each cookie. Bake at 350 degrees for about 14 minutes. Cool on pan for 3-4 minutes, then remove to a wire rack. Store in a tightly covered container. Makes about 36 cookies.


Combine the flour, baking soda, salt and pudding mix. Set this aside for later. 

Then I used my wonderful Kitchen Aide Stand Mixer to mix the next set of ingredients. Beat together the butter, peanut butter, sugar and brown sugar until fluffy. 

((These little 1/4 cup packages by Imperial Sugar are AMAZING! No measuring cup required... I just needed two of these 1/4 cup packages to get my 1/2 cup of brown sugar needed for this recipe!))

Oh that's just Duke... waiting patiently to have a lick of batter. :0

Ok... back to the cookies. Here is my mixer beating together the butter, peanut butter, sugar and brown sugar .

Next, add in the vanilla, honey and eggs. 

Now slowly add the dry ingredients that you set aside earlier. Turn your mixer on the slowest setting and using a spoon gently scoop the dry ingredients into the mixer bowl. 

Once you're done beating together all the ingredients, measure out your cup of Reese's Pieces and your chocolate chips. I just put them in one measuring cup. You are going to mix these in BY HAND (with a spoon) don't use your mixer for this part. (OH I left our the banana chips.. but you can add them )


Ta-Da! And they really really are amazing!

This recipe is definitely a pin!!!


Here is the pin where I found this recipe. This lady made up herself!
http://pinterest.com/pin/241787073714747508/

Saturday, May 19, 2012

IronMan 2012 - The Woodlands, Texas

Today was IronMan 2012 for the Woodlands, Texas... and boy talk about an experience! I still have an adrenaline rush from it and I didn't even compete!

Early this morning the racers started off with a 2.4 mile swim then a 112 mile bike ride ending with a 26.2 mile run. These guys are obviously VERY fit and trained for this!

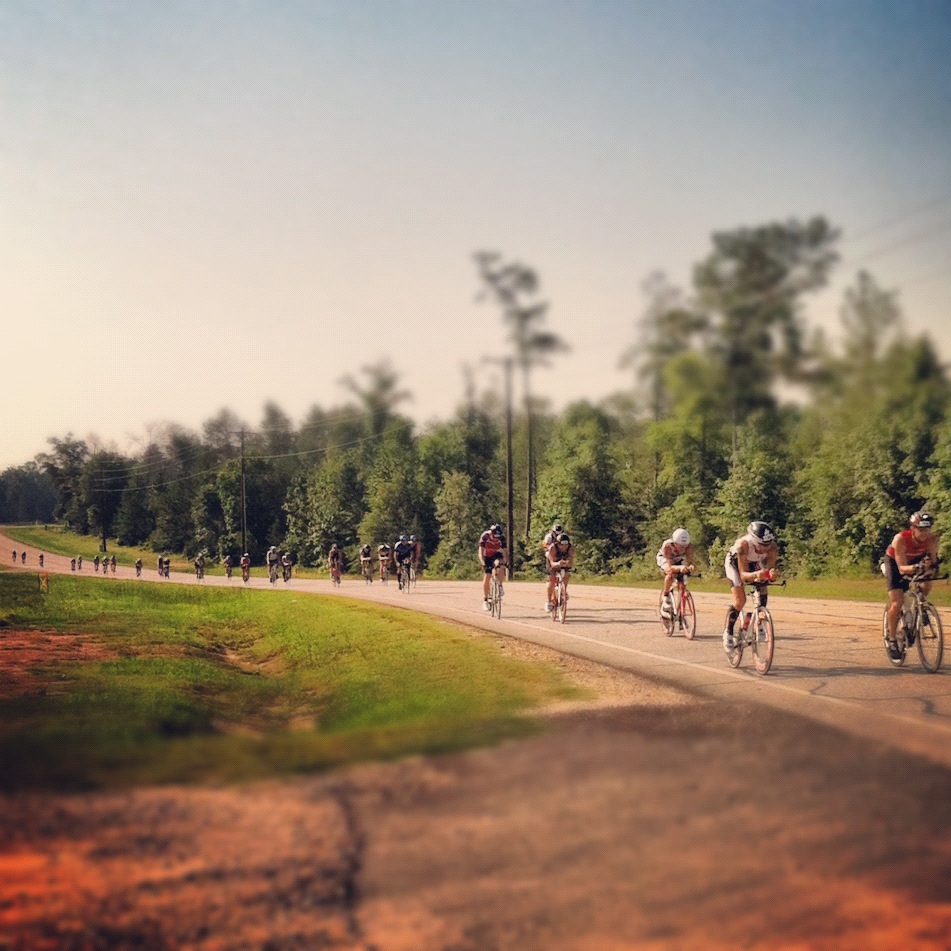
Well, lucky me, part of the bike route was coming right past my house! I was so excited the night before thinking about sitting out on the lawn yelling and cheering these amazing men and women on! So at 7:15am I was out in the truck of my SUV waiting... and almost like clock work here they came! I am very sad to say I missed taking a picture of the lead keeper truck with the two guys that were in the lead.. BUT I did get some fantastic pictures that I am very excited to share!!! (all taken with my new Iphone at that!)


^^ This is one of my favorite pictures!^^

And now on to the finish line....

This would be Jordan Rapp the 2012 IronMan Texas Champion (8:10:44)!!!!! This guy got a second chance at life after a near fatal hit and run in March of 2010. 

Justin Daerr finished in second with 8:22:15!


The women's champion Mary Beth Ellis with a course record of 8:54:58!
Mary Beth Ellis won her third IronMan title with Jordan Rapp at the 2011 IronMan Canada!

Caitlin Snow was the second woman to run across the finish line with 9:01:32!


One of the best parts of the race was when two brothers came up to the finish line and did a full on SPRINT to race each other to the finish... 

You can see the determination in their faces!!!!

The brother in the blue beat his brother by two steps!!!

While standing around cheering for strangers... we made a sweet friend from Ontario, Canada who was here to watch her husband finish. She had been watching him all day.. and knew exactly where he should be at what exact time for each transition. You could tell she was very dedicated to him being in the IronMan. I got some amazing shots of her with their son watching their dad come in #16 at 9:46:40!


All and all.. today was a very touching experience and next year I will be volunteering! Hope you enjoy the pictures! :)


Monday, May 14, 2012

Easy way to hang pictures

Here's another quick post! I bought some really neat antique letters the other day at Hobby Lobby for half off and wanted to hang them above my bedroom window. Problem was... how to get 7 pictures hung up evenly on a wall with proper spacing?

The answer? WAX PAPER!!

First lay down what you want to put up on the wall EXACTLY how you want it... except upside down. 

Lay your wax paper out on top of the pictures and then you can either: 
A) trace the exact dimensions of the pictures
B) just poke holes where the nail would go... which is what I did because I didn't have time to trace.  

Next measure where you want your pictures to go and tape the wax paper to the wall. 

Now if you're lucky.. you can have someone hammer in the nails for you while you take pictures :p 
Thanks dad!

Almost done hammering!

Now rip off the wax paper!!! It's time to hang your pictures!!!!

Huge thanks to my dad!

Ta-Da!! 

Do you know where this quote is from??